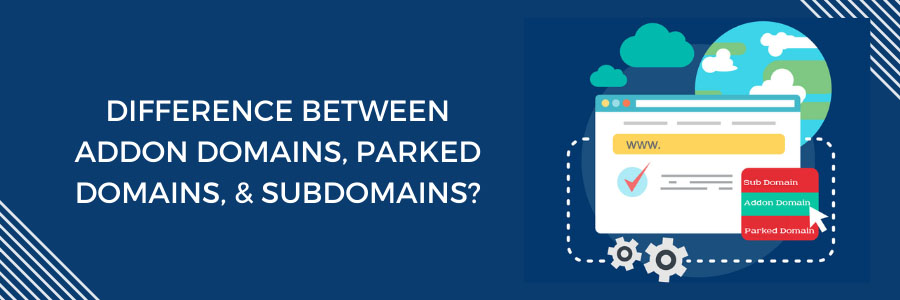
If you are new to web hosting, you might have come across the terms parked domain, add-on domain, or subdomain, with your server hosting company and wondered what the differences between these three domains.
Table of Contents
What is a Domain Name?

A domain name is a unique, human-readable address used to identify a website or other online resource on the internet. It typically consists of two main parts:
- Top-Level Domain (TLD): This is the part that comes after the final dot in the domain name, such as “.com,” “.org,” “.net,” “.edu,” “.gov,” and country code TLDs like “.uk” for the United Kingdom or “.ca” for Canada.
- Second-Level Domain: This is the main part of the domain name and comes before the TLD. For example, in “openai.com,” “openai” is the second-level domain.
A domain name translates to an IP address (a numeric identifier for computers and devices on the internet) via the Domain Name System (DNS). This allows users to easily access websites and other services without needing to remember long numeric IP addresses.
When you register a domain name, you are essentially leasing it for a period of time from a domain registrar, which is an organization that manages the reservation of internet domain names.
What is a Addon Domain

An addon domain, also known as an additional domain, is a feature provided by many web hosting services that allows you to host multiple domains under a single hosting account. This means you can add more than one domain name to your existing hosting plan and manage them from the same control panel.
When you set up an addon domain, it will typically have its own separate directory on your server, which allows you to host a completely different website from your main domain. The domain will have its own content, such as web pages, media files, and databases, as if it were on a separate hosting account.
Here are the main points about addon domains:
- Separate Identity: Addon domains function independently of your primary domain. Visitors can access the addon domain’s content as if it were hosted on a separate server.
- Resource Sharing: All domains (main and addon) share the same hosting account resources, such as disk space, bandwidth, and server resources.
- Management: Addon domains can be managed from your web hosting account’s control panel. This includes tasks like setting up DNS records, uploading files, creating email accounts, and managing databases.
- Cost-Effective: If you have multiple domains to manage, using an addon domain can be a cost-effective option as it allows you to consolidate your hosting resources under one account instead of paying for multiple separate hosting plans.
Why You Need an Addon Domain
There are several reasons why you might benefit from using an addon domain:
- Cost-Effective Hosting: Addon domains allow you to host multiple websites under one hosting account, which can be more cost-effective than purchasing separate hosting plans for each domain.
- Ease of Management: By using addon domains, you can manage multiple websites from a single control panel. This streamlines tasks such as updates, maintenance, and monitoring, making it easier to keep track of all your sites.
- Flexibility: Addon domains allow you to create separate websites for different purposes, such as business ventures, personal projects, blogs, or client websites, all under one hosting account. This gives you the flexibility to diversify your online presence.
- Branding and Identity: If you have multiple business ventures or projects, each can have its own distinct domain name and branding. This can help you create separate identities for each venture.
- Testing and Development: Addon domains can be used for testing and developing new projects without impacting your main website. This can be useful for trying out new features or services.
- Expansion: As your business or online presence grows, you might want to expand by adding new websites. Addon domains make it easy to do this without the need for separate hosting accounts.
- SEO Advantages: Hosting multiple domains under one account can help improve SEO by allowing you to target different audiences and niches with different domain names and content strategies.
- Centralized Email Management: If you manage multiple domains, you can centralize your email management by hosting them under one account, making it easier to configure and manage email accounts.
How to Create an Addon Domain
Creating an addon domain involves adding a new domain to your existing hosting account and configuring it to point to a specific directory on your server. Here’s a general step-by-step guide on how to create an addon domain. Note that the exact process may vary depending on your web hosting provider, so you may need to refer to their specific instructions for your hosting control panel.
Step 1: Purchase and Register the Domain Name
- If you haven’t already, purchase and register the new domain name you want to use as an addon domain from a domain registrar.
Step 2: Log In to Your Hosting Control Panel
- Log in to your web hosting account’s control panel (e.g., cPanel, Plesk, etc.).
Step 3: Find the Addon Domain Section
- In the control panel, navigate to the section where you can manage domains. Look for an option such as “Domains,” “Addon Domains,” or similar.
Step 4: Add the Addon Domain
- In the addon domain section, you will be prompted to enter the following information:
- New Domain Name: Enter the new domain name you want to add.
- Subdomain or FTP Username: This may be automatically generated by the hosting provider. It is a technical requirement for linking the domain, but you may not need to use it.
- Document Root: Choose or confirm the directory where you want the addon domain’s files to be stored. This will usually be a folder in your hosting account’s file system.
Step 5: Configure DNS Settings
- After creating the addon domain, you may need to update the DNS settings for the domain name to point to your hosting provider’s servers. This typically involves changing the domain’s nameservers to the ones provided by your hosting provider.
Step 6: Verify the Addon Domain
- After setting up the addon domain and updating the DNS, it may take some time for the changes to propagate across the internet (usually a few hours but sometimes up to 48 hours).
- Verify that the addon domain is working by accessing the domain URL in your web browser.
Step 7: Upload Content
- Once the addon domain is set up and verified, you can upload your website’s content (files, images, scripts, etc.) to the document root directory specified during the setup.
Step 8: Test the Addon Domain
- Test the addon domain by accessing it in a web browser to make sure everything is working correctly.
What is a Parked Domain

A parked domain, also known as a parking domain or domain parking, is a domain name that is registered and directed to an existing website or a placeholder page, but doesn’t yet have its own website with unique content. It can be thought of as a placeholder for future use or development.
Here are some key points about parked domains:
- Domain Redirection: In some cases, a parked domain may be redirected to an existing website. This can be useful for multiple domain names pointing to one primary site, potentially helping capture different traffic sources or protect your brand.
- Holding for Future Use: Domain owners might park a domain name while they plan its future use or wait for a good opportunity to develop a website for it.
- Monetization: Some domain owners use parked domains to generate revenue by displaying ads on a parking page. Visitors to the domain may see ads, and the domain owner can earn money from ad clicks.
- Brand Protection: Parking a domain can prevent others from registering it, helping protect a brand’s name, variations, or similar-sounding domain names from being used by competitors or malicious parties.
- Investment: Domain parking can be a way for domain investors to hold onto domains they believe might increase in value. The parked domain serves as a placeholder until the owner decides to sell it or develop it.
- Placeholder Page: Sometimes, a parked domain will display a generic page that might include a message saying the domain is under construction, coming soon, or for sale.
How to Park a Domain
- Register the Domain: Purchase and register the domain you want to park with a domain registrar.
- Log In to Your Domain Registrar Account: Access your domain registrar account where your new domain is listed.
- Set Up Parking: Use the domain registrar’s domain parking feature. This may involve pointing the domain to a parking service or setting up a parking page.
- Redirect the Domain (Optional): If you want the parked domain to redirect to an existing website, set up a URL redirect to the desired destination.
- Monetize the Domain (Optional): If you want to monetize your parked domain, you can choose a domain parking service that offers ad display options.
- Check the Parking Page: Visit your domain to ensure the parking page is set up as desired.
What is a Subdomain

A subdomain is a prefix added to the main domain name that helps organize and divide a website into different sections. It is an extension of the primary domain name, creating a hierarchical structure within a website. For example, in the URL “blog.example.com,” “blog” is the subdomain of the main domain “example.com.”
Key Points About Subdomains:
- Organization: Subdomains can be used to organize different parts of a website. For instance, you might use “shop.example.com” for an online store and “support.example.com” for a customer support portal.
- Independence: Subdomains can have their own unique content, design, and functionality. They can also have separate databases and configurations, which allows you to create different websites under the same domain.
- SEO and Branding: Subdomains can help with search engine optimization (SEO) by allowing you to target different keywords and audiences with different parts of your website. They also enable you to maintain consistent branding across different areas of your site.
- Ease of Management: Subdomains allow you to manage different sections of a website separately, which can make it easier to delegate tasks to different teams or focus on specific aspects of your online presence.
- Flexibility: Subdomains offer flexibility in creating different online experiences under the same domain, which can be helpful for expanding your website or catering to different user needs.
- Resource Allocation: In some hosting environments, you can allocate resources such as disk space, bandwidth, or memory differently to various subdomains, allowing you to prioritize certain parts of your website.
Examples of Subdomains:
- “blog.example.com” for a blog.
- “store.example.com” for an online store.
- “support.example.com” for a customer support portal.
How to Create a Subdomain
- Log In to Your Hosting Control Panel: Access your web hosting control panel (such as cPanel or another similar platform).
- Find the Subdomains Section: Look for the section that allows you to create and manage subdomains.
- Add a Subdomain: In the subdomains section, enter the desired subdomain name (e.g., “blog”) and choose the main domain (e.g., “example.com”) under which the subdomain will be created.
- Set the Document Root: Specify the document root (directory) for the subdomain. This is where the files for the subdomain will be stored.
- Save the Changes: Confirm and save the changes to create the subdomain.
- Upload Content: Once the subdomain is set up, you can upload content to the designated directory.
- Test the Subdomain: After the subdomain is created, test it by visiting the subdomain’s URL in a web browser to ensure it is working correctly.
Conclusion
Once you’ve carefully considered the benefits of using a subdomain, add-on domain, or parked domain, you can then find ways to better leverage the domains you own.