To add customer in Reseller Plesk Panel, it’s essential to understand the process and the role of a reseller in managing customer accounts. As a reseller, you can create, manage, and assign resources to your customers. Add customer in Reseller Plesk Panel involves configuring their hosting account, setting up their services, and ensuring they have access to the resources they need.
Table of Contents
What is Plesk?

Plesk is a web hosting control panel that allows administrators and resellers to manage websites, domains, and hosting services through an intuitive, user-friendly interface. It provides a range of tools to streamline server management, making it easier to handle tasks like website creation, domain management, email setup, security features, and resource allocation.
Key Features of Plesk:
- Website and Domain Management: Users can create and manage websites, including setting up domains, DNS records, and SSL certificates.
- Email Management: Plesk supports the creation and management of email accounts, aliases, and forwarding, as well as spam protection.
- Security: Plesk includes built-in security tools, such as firewalls, DDoS protection, SSL management, and regular software updates to keep your server secure.
- Backup and Recovery: It offers backup and recovery solutions for restoring websites and databases in case of issues.
- App and Software Management: Plesk allows installation and management of various web applications like WordPress, Joomla, and Drupal, along with popular CMS and e-commerce tools.
- Automation and Reseller Capabilities: Plesk is commonly used by hosting companies and resellers to offer web hosting plans to clients, providing automated provisioning and billing tools.
- Multi-Platform Support: Plesk can be used on both Linux and Windows servers, giving flexibility for various server environments.
- User Interface: Its clean and intuitive UI allows both beginners and advanced users to easily manage hosting tasks.
How to Add a Customer to the Reseller Plesk Panel?
- Log in to Plesk.
- Select the “Customers” sub-option under “Hosting Services” section.
- Click on the “Add a customer” button.

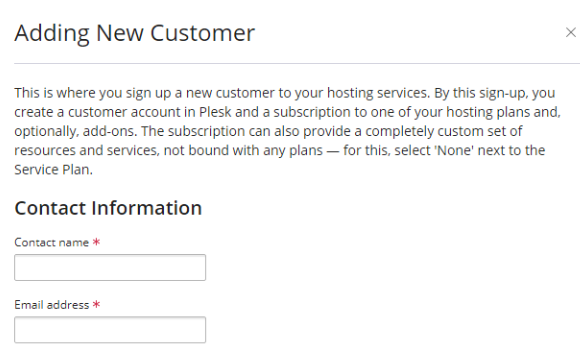
- You will encounter a form-style interface; input your contact information.
- Enter the “Contact Name” and “Email Address” under “Contact Information” section.
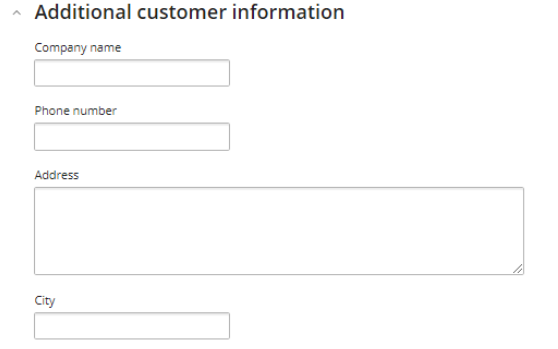
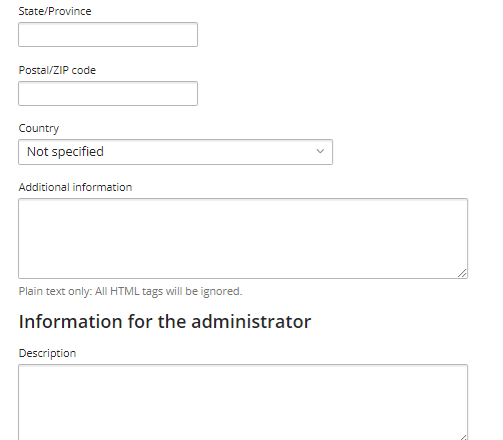
- Under “Additional Customer Information” section, enter “Company Name”, “Phone Number”, “Address”, “City”, “State/Province”, “Postal/Zip code”, “Country”, and any additional information if any.
- You can also add a description under the “Information for the Administrator” section.
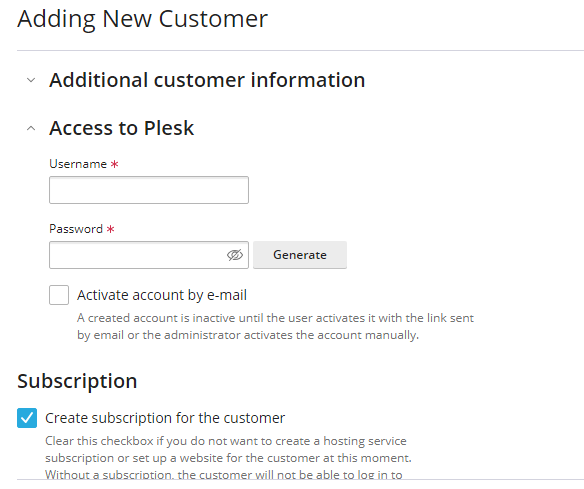
- Enter the “Username” and “Password” under the “Access to Plesk” section. You may use the auto-generated password using the “Generate” button.
- If you wish to send an activation link to the customer through email then select the checkbox.
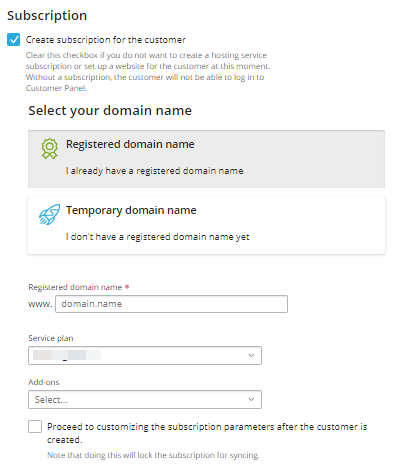
- By default, the checkbox in the Subscription section is selected; if you deselect this option, the customer will lose access to the Customer Panel.
- Now, select your domain name and enter the “Registered Domain name”.
- Select the “Service Plan” and “Add-ons”.
- Choosing this checkbox will prevent the subscription from synchronizing, so it is advisable not to select it.
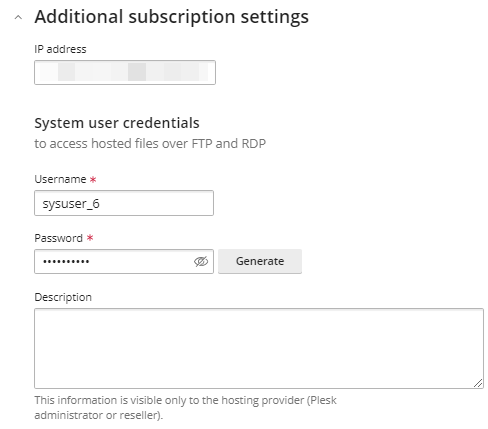
- Then select the “IP address”.
- Enter the “System User Credentials” to access hosted files over FTP and RDP such as “Username” and “Password”.
- If you wish to include a description, you can enter it in this textbox; this information is exclusively visible to the Plesk administrator or reseller.
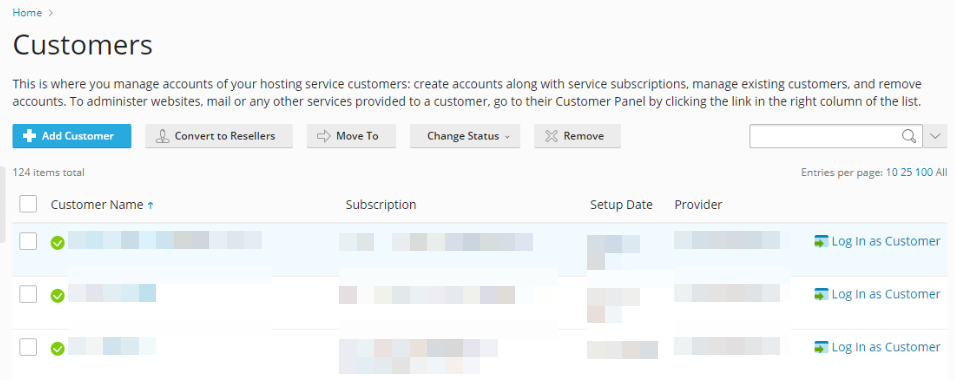
- Click on the “Add Customer” button.

- You will find the added customer in the list as shown below.
This article explains how to add a customer in Reseller Plesk Panel. Should you require any assistance, feel free to reach out to our support team.